Categories
App Service Azure Microsoft WebJobs

Receive emails from Azure WebJobs when errors are detected

We will learn how to be notified via email when errors occur in an Azure WebJob.

When an Azure WebJob is executed wouldn’t it be good to be notified when something goes wrong?

Thanks to the following extensions this is something we can easily do:

WebJobs ErrorTrigger extension

WebJobs SendGrid extension


In this article, we will discover how to send emails from an Azure WebJob with the SenGrid extension when errors are detected using the ErrorTrigger extension. As a base, we will create a project with the Azure WebJob template in Visual Studio.


Creation

The first thing you will need is to add the following NuGet package to your project: Microsoft.Azure.WebJobs.Extensions.SendGrid


To enable the ErrorTrigger and SendGrid extensions in your WebJob you will need to configure the JobHostConfiguration like the following:

using Microsoft.Azure.WebJobs;

namespace AzureWebJobs.ErrorsEmails
{
    // To learn more about Microsoft Azure WebJobs SDK, please see https://go.microsoft.com/fwlink/?LinkID=320976
    class Program
    {
        // Please set the following connection strings in app.config for this WebJob to run:
        // AzureWebJobsDashboard and AzureWebJobsStorage
        static void Main()
        {
            var config = new JobHostConfiguration();

            if (config.IsDevelopment)
            {
                config.UseDevelopmentSettings();
            }

            config.UseCore();
            config.UseSendGrid();

            var host = new JobHost(config);
            // The following code ensures that the WebJob will be running continuously
            host.RunAndBlock();
        }
    }
}

The important part here is to call the extensions named UseCore and UseSendGrid. This will enable the ErrorTrigger and SendGrid extensions.


We will now add a new application settings to be able to connect to SendGrid:

<?xml version="1.0" encoding="utf-8"?>
<configuration>
  <connectionStrings>
    <!-- The format of the connection string is "DefaultEndpointsProtocol=https;AccountName=NAME;AccountKey=KEY" -->
    <!-- For local execution, the value can be set either in this config file or through environment variables -->
    <add name="AzureWebJobsDashboard" connectionString="" />
    <add name="AzureWebJobsStorage" connectionString="" />
  </connectionStrings>
  <appSettings>
    <add key="AzureWebJobsSendGridApiKey" value="" />
  </appSettings>
  <startup>
    <supportedRuntime version="v4.0" sku=".NETFramework,Version=v4.5.2" />
  </startup>
  <runtime>
    <assemblyBinding xmlns="urn:schemas-microsoft-com:asm.v1">
      <dependentAssembly>
        <assemblyIdentity name="Microsoft.Azure.KeyVault.Core" publicKeyToken="31bf3856ad364e35" culture="neutral" />
        <bindingRedirect oldVersion="0.0.0.0-2.0.0.0" newVersion="2.0.0.0" />
      </dependentAssembly>
      <dependentAssembly>
        <assemblyIdentity name="Microsoft.WindowsAzure.Storage" publicKeyToken="31bf3856ad364e35" culture="neutral" />
        <bindingRedirect oldVersion="0.0.0.0-8.1.4.0" newVersion="8.1.4.0" />
      </dependentAssembly>
      <dependentAssembly>
        <assemblyIdentity name="Newtonsoft.Json" publicKeyToken="30ad4fe6b2a6aeed" culture="neutral" />
        <bindingRedirect oldVersion="0.0.0.0-10.0.0.0" newVersion="10.0.0.0" />
      </dependentAssembly>
    </assemblyBinding>
  </runtime>
</configuration>
  • AzureWebJobsSendGridApiKey: an API Key related to your SendGrid account.

Now using the default ProcessQueueMessage function that uses a QueueTrigger, we will call the ProcessMessage method. This method checks if the message is empty. If it is, an exception will be thrown.

Then we create a function named GlobalErrorMonitor. This function will catch errors and send emails using SendGrid:

using System;
using System.IO;
using Microsoft.Azure.WebJobs;
using Microsoft.Azure.WebJobs.Extensions;
using SendGrid.Helpers.Mail;

namespace AzureWebJobs.ErrorsEmails
{
    public class Functions
    {
        // This function will get triggered/executed when a new message is written 
        // on an Azure Queue called queue.
        public static void ProcessQueueMessage([QueueTrigger("queue")] string message, TextWriter log)
        {
            log.WriteLine(message);

            ProcessMessage(message);
        }

        /// <summary>
        /// Triggered when an error is reported in other functions.
        /// Called whenever 2 errors occur within a 3 minutes sliding window (throttled at a maximum of 2 notifications per 10 minutes).
        /// </summary>
        public static void GlobalErrorMonitor([ErrorTrigger("0:03:00", 2, Throttle = "0:10:00")] TraceFilter filter, TextWriter log, [SendGrid(From = "no-reply@anydomainxyz.com", To = "anybody@anydomainxyz.com")] out Mail mail)
        {
            mail = new Mail();

            mail.Subject = "WebJob - Warning - An error has been detected in a job";
            mail.AddContent(new Content("text/plain", filter.GetDetailedMessage(1)));

            Console.Error.WriteLine("An error has been detected in a function.");

            log.WriteLine(filter.GetDetailedMessage(1));
        }

        private static void ProcessMessage(string message)
        {
            if (string.IsNullOrEmpty(message))
            {
                throw new ArgumentNullException(nameof(message));
            }

            //Do some work here...
        }
    }
}

You can notice two things here:

  • We use the ErrorTrigger attribute to be able to use ErrorTrigger extension in the GlobalErrorMonitor function.
  • We use the SendGrid attribute to be able to use SendGrid in the GlobalErrorMonitor function.


Example of use

Once the WebJob ready and properly configured, we will launch it:

Found the following functions:
AzureWebJobs.ErrorsEmails.Functions.ProcessQueueMessage
Job host started

Now add an empty message to the queue. The ProcessQueueMessage function will be called 5 times and the message will be moved to the queue-poison.

After the second exception, you can notice that GlobalErrorMonitor is triggered:

Executing 'Functions.ProcessQueueMessage' (Reason='New queue message detected on 'queue'.', Id=8ee22555-15df-458e-8a0e-cdd1b9b2a97a)
Executing 'Functions.GlobalErrorMonitor' (Reason='Error trigger fired', Id=8b368696-7dab-4908-af53-18018abd8f3e)
An error has been detected in a function.
2 events at level 'Error' or lower have occurred within time window 00:03:00.

05/16/2017 02:41:20 Error Exception while executing function: Functions.ProcessQueueMessage WebJobs.Execution
Microsoft.Azure.WebJobs.Host.FunctionInvocationException: Exception while executing function: Functions.ProcessQueueMessage ---> System.ArgumentNullException:
Value cannot be null. Parameter name: message

Executed 'Functions.GlobalErrorMonitor' (Succeeded, Id=8b368696-7dab-4908-af53-18018abd8f3e)
Executed 'Functions.ProcessQueueMessage' (Succeeded, Id=8ee22555-15df-458e-8a0e-cdd1b9b2a97a)

 You should receive an email to the address you’ve specified in the To property of the SendGrid attribute. The title will be as WebJob – Warning – An error has been detected in a job, and the body will contain the exception with the stack trace.


To go further

The error trigger is configured to be called whenever 2 errors occur within a 3 minutes sliding window throttled at a maximum of 2 notifications per 10 minutes.

You can easily configure it differently to receive less notifications:

public static void GlobalErrorMonitor([ErrorTrigger("0:10:00", 5, Throttle = "1:00:00")] TraceFilter filter, TextWriter log, [SendGrid(From = "no-reply@anydomainxyz.com", To = "anybody@anydomainxyz.com")] out Mail mail)


Summary

We have seen how to send emails from an Azure WebJob with the SenGrid extension when errors are detected using the ErrorTrigger extension.


You can download the example solution here:

Download full sources

Or

Browse the GitHub repository

(Note that the project uses Microsoft.Azure.WebJobs version 2.0.0)


Please feel free to comment or contact me if you have any question about this article.

Categories
App Service Azure ErrorTrigger extension Microsoft WebJobs

Monitoring errors in Azure WebJobs with the ErrorTrigger extension

We will learn in a simple scenario how to monitor errors in an Azure WebJob.

When developing jobs with Azure WebJob, it’s a good practice to implement error monitoring in case something goes wrong when a job is executed.

The WebJobs ErrorTrigger extension, part of the Core extensions, will help us achieve that.


Today we will learn how to monitor errors with Azure WebJob using the ErrorTrigger extension. As a base, we will create a project with the Azure WebJob template in Visual Studio.


Creation

The first thing you will need is to add the following NuGet package to your project: Microsoft.Azure.WebJobs.Extensions


To enable the ErrorTrigger extension in your WebJob you will need to configure the JobHostConfiguration like the following:

using Microsoft.Azure.WebJobs;

namespace AzureWebJobs.ErrorTriggerExtension
{
	// To learn more about Microsoft Azure WebJobs SDK, please see https://go.microsoft.com/fwlink/?LinkID=320976
	class Program
	{
		// Please set the following connection strings in app.config for this WebJob to run:
		// AzureWebJobsDashboard and AzureWebJobsStorage
		static void Main()
		{
			var config = new JobHostConfiguration();

			if (config.IsDevelopment)
			{
				config.UseDevelopmentSettings();
			}

			config.UseCore();

			var host = new JobHost(config);
			// The following code ensures that the WebJob will be running continuously
			host.RunAndBlock();
		}
	}
}

The important part here is to call the extension named UseCore. This will enable the ErrorTrigger extension.


Now we will create two functions ProcessQueueAMessage and ProcessQueueBMessage using the default ProcessQueueMessage function that uses a QueueTrigger.

Both will call the ProcessMessage method. This method checks if the message is empty. If it is, an exception will be thrown.

ProcessQueueAMessage will simply call ProcessMessage, ProcessQueueBMessage will also call it but catching exceptions and logging them using the TraceWriter.

Then we create a function named GlobalErrorMonitor, giving the following code:

using System;
using System.IO;
using Microsoft.Azure.WebJobs;
using Microsoft.Azure.WebJobs.Extensions;
using Microsoft.Azure.WebJobs.Host;

namespace AzureWebJobs.ErrorTriggerExtension
{
	public class Functions
	{
		// This function will get triggered/executed when a new message is written 
		// on an Azure Queue called queue.
		public static void ProcessQueueAMessage([QueueTrigger("queuea")] string message, TextWriter log)
		{
			log.WriteLine(message);

			ProcessMessage(message);
		}

		public static void ProcessQueueBMessage([QueueTrigger("queueb")] string message, TraceWriter logger)
		{
			logger.Info(message);

			try
			{
				ProcessMessage(message);
			}
			catch (Exception ex)
			{
				logger.Error($"An error occurred in: '{nameof(ProcessQueueBMessage)}'", ex, nameof(Functions));
			}
		}

		/// <summary>
		/// Triggered when an error is reported in other functions.
		/// Called whenever 2 errors occur within a 3 minutes sliding window (throttled at a maximum of 2 notifications per 10 minutes).
		/// </summary>
		public static void GlobalErrorMonitor([ErrorTrigger("0:03:00", 2, Throttle = "0:10:00")] TraceFilter filter, TextWriter log)
		{
			Console.Error.WriteLine("An error has been detected in a function.");

			log.WriteLine(filter.GetDetailedMessage(1));
		}

		private static void ProcessMessage(string message)
		{
			if (string.IsNullOrEmpty(message))
			{
				throw new ArgumentNullException(nameof(message));
			}

			//Do some work here...
		}
	}
}

You can notice two things here:

  • We use the ErrorTrigger attribute to be able to use ErrorTrigger extension in the GlobalErrorMonitor function.
  • The error trigger is configured to be called whenever 2 errors occur within a 3 minutes sliding window (throttled at a maximum of 2 notifications per 10 minutes.


Example of use

Once the WebJob ready and properly configured, we will launch it:

Found the following functions:
AzureWebJobs.ErrorTriggerExtension.Functions.ProcessQueueAMessage
AzureWebJobs.ErrorTriggerExtension.Functions.ProcessQueueBMessage
AzureWebJobs.ErrorTriggerExtension.Functions.GlobalErrorMonitor
Job host started

Now add an empty message to the queuea. The ProcessQueueAMessage function will be called 5 times and the message will be moved to the queuea-poison.

After the second exception you can notice that GlobalErrorMonitor is triggered:

Executing 'Functions.ProcessQueueAMessage' (Reason='New queue message detected on 'queuea'.', Id=8ee22555-15df-458e-8a0e-cdd1b9b2a97a)
Executing 'Functions.GlobalErrorMonitor' (Reason='Error trigger fired', Id=8b368696-7dab-4908-af53-18018abd8f3e)
An error has been detected in a function.
2 events at level 'Error' or lower have occurred within time window 00:03:00.

04/11/2017 23:29:43 Error Exception while executing function: Functions.ProcessQueueAMessage WebJobs.Execution Microsoft.Azure.WebJobs.Host.FunctionInvocationException: Exception while executing function: Functions.ProcessQueueAMessage ---> System.ArgumentNullException: Value cannot be null.
Parameter name: message
 at AzureWebJobs.ErrorTriggerExtension
 ...

Executed 'Functions.GlobalErrorMonitor' (Succeeded, Id=8b368696-7dab-4908-af53-18018abd8f3e)
Executed 'Functions.ProcessQueueBMessage' (Succeeded, Id=8ee22555-15df-458e-8a0e-cdd1b9b2a97a)


Now restart the WebJob and add an empty message to the queueb. The ProcessQueueBMessage function will be called once as we are catching and logging the ArgumentNullException.

Notice that the GlobalErrorMonitor is not executed as it is configured to be triggered when at least 2 errors occur.

Now add another empty message to the queueb and you will now notice that GlobalErrorMonitor is triggered:

Executing 'Functions.ProcessQueueBMessage' (Reason='New queue message detected on 'queueb'.', Id=9ba82a41-fe9c-4227-a306-9af2dc9db7c2)
Executing 'Functions.GlobalErrorMonitor' (Reason='Error trigger fired', Id=03a3c8ea-16cf-46e9-a6c5-074a4f47c997)
An error has been detected in a function.
2 events at level 'Error' or lower have occurred within time window 00:03:00.

04/11/2017 23:43:05 Error An error occurred in: 'ProcessQueueBMessage' Functions System.ArgumentNullException: Value cannot be null.
Parameter name: message
 at AzureWebJobs.ErrorTriggerExtension
 ...

Executed 'Functions.GlobalErrorMonitor' (Succeeded, Id=03a3c8ea-16cf-46e9-a6c5-074a4f47c997)
Executed 'Functions.ProcessQueueBMessage' (Succeeded, Id=9ba82a41-fe9c-4227-a306-9af2dc9db7c2)


To go further

Here we have setup a global error handler and you could setup more handlers, but you can also have function specific error handlers.

To create a function specific handler use the naming convention based on the “ErrorHandler” suffix.

For example, if we want to have a specific handler for the function ProcessQueueAMessage we will would create the following:

public static void ProcessQueueAMessageErrorHandler([ErrorTrigger("0:03:00", 2, Throttle = "0:10:00")] TraceFilter filter, TextWriter log)

In that case only errors coming from the function ProcessQueueAMessage will trigger the ErrorTrigger extension.


Summary

We have learned how to monitor errors with Azure WebJob using the ErrorTrigger extension.


You can download the example solution here:

Download full sources

Or

Browse the GitHub repository

(Note that the project uses Microsoft.Azure.WebJobs version 2.0.0)


Please feel free to comment or contact me if you have any question about this article.
Categories
Azure Microsoft SendGrid extension WebJobs

How to send emails with SendGrid in Azure WebJobs using the SendGrid extension

Do you want to send emails in an Azure WebJob? In a simple scenario we will discover how to do it with SendGrid.

When you need to send emails from an Azure WebJob, the following extension is very helpful:

WebJobs SendGrid extension

Today we will take a look at the version 2.0 that came along with the release of the Azure WebJobs SDK 2.0.

In this article, we will discover how to send a simple email from an Azure WebJob with the SenGrid extension. As a base, we will create a project with the Azure WebJob template in Visual Studio.


Creation

The first thing you will need is to add the following NuGet package to your project: Microsoft.Azure.WebJobs.Extensions.SendGrid


To enable the SendGrid extension in your WebJob you will need to configure the JobHostConfiguration like the following:

using Microsoft.Azure.WebJobs;

namespace AzureWebJobs.SendGridExtension
{
	// To learn more about Microsoft Azure WebJobs SDK, please see https://go.microsoft.com/fwlink/?LinkID=320976
	class Program
	{
		// Please set the following connection strings in app.config for this WebJob to run:
		// AzureWebJobsDashboard and AzureWebJobsStorage
		static void Main()
		{
			var config = new JobHostConfiguration();

			if (config.IsDevelopment)
			{
				config.UseDevelopmentSettings();
			}

			config.UseSendGrid();

			var host = new JobHost(config);
			// The following code ensures that the WebJob will be running continuously
			host.RunAndBlock();
		}
	}
}

The important part here is to call the extension named UseSendGrid. This will enable the SendGrid extension.


We will now add a new application settings to be able to connect to SendGrid:

<?xml version="1.0" encoding="utf-8"?>
<configuration>
  <connectionStrings>
    <!-- The format of the connection string is "DefaultEndpointsProtocol=https;AccountName=NAME;AccountKey=KEY" -->
    <!-- For local execution, the value can be set either in this config file or through environment variables -->
    <add name="AzureWebJobsDashboard" connectionString="" />
    <add name="AzureWebJobsStorage" connectionString="" />
  </connectionStrings>
  <appSettings>
    <add key="AzureWebJobsSendGridApiKey" value="" />
  </appSettings>
  <startup>
    <supportedRuntime version="v4.0" sku=".NETFramework,Version=v4.5.2" />
  </startup>
  <runtime>
    <assemblyBinding xmlns="urn:schemas-microsoft-com:asm.v1">
      <dependentAssembly>
        <assemblyIdentity name="Microsoft.Azure.KeyVault.Core" publicKeyToken="31bf3856ad364e35" culture="neutral" />
        <bindingRedirect oldVersion="0.0.0.0-2.0.0.0" newVersion="2.0.0.0" />
      </dependentAssembly>
      <dependentAssembly>
        <assemblyIdentity name="Microsoft.WindowsAzure.Storage" publicKeyToken="31bf3856ad364e35" culture="neutral" />
        <bindingRedirect oldVersion="0.0.0.0-8.1.1.0" newVersion="8.1.1.0" />
      </dependentAssembly>
      <dependentAssembly>
        <assemblyIdentity name="Newtonsoft.Json" publicKeyToken="30ad4fe6b2a6aeed" culture="neutral" />
        <bindingRedirect oldVersion="0.0.0.0-10.0.0.0" newVersion="10.0.0.0" />
      </dependentAssembly>
    </assemblyBinding>
  </runtime>
</configuration>
  • AzureWebJobsSendGridApiKey: an API Key related to your SendGrid account.


Now using the default ProcessQueueMessage function that uses a QueueTrigger, we want to send an email when a message is added to the queue:

using System.IO;
using Microsoft.Azure.WebJobs;
using SendGrid.Helpers.Mail;

namespace AzureWebJobs.SendGridExtension
{
	public class Functions
	{
		// This function will get triggered/executed when a new message is written 
		// on an Azure Queue called queue.
		public static void ProcessQueueMessage([QueueTrigger("queue")] string message, TextWriter log, [SendGrid(From = "no-reply@anydomainxyz.com", To = "anybody@anydomainxyz.com")] out Mail mail)
		{
			log.WriteLine(message);

			mail = new Mail();

			mail.Subject = "WebJob - Queue message processed successfully";
			mail.AddContent(new Content("text/plain", $"The message '{message}' was successfully processed."));
		}
	}
}

You can notice several things here:

  • We use the SendGrid attribute to be able to use SendGrid in the function.
  • The out contextual keyword with the mail parameter allow us to pass the email to the extension that will then send it to SendGrid.
  • The Mail object is coming directly from the SendGrid library.
  • Update the To address, so you can receive the emails.


Example of use

Once the WebJob ready and properly configured, we will launch it and add a message to the queue:

Found the following functions:
AzureWebJobs.SendGridExtension.Functions.ProcessQueueMessage
Job host started
Executing 'Functions.ProcessQueueMessage' (Reason='New queue message detected on 'queue'.', Id=ef4a15bf-ce79-4be1-8b56-a3237b929b50)
My queue test message
Executed 'Functions.ProcessQueueMessage' (Succeeded, Id=ef4a15bf-ce79-4be1-8b56-a3237b929b50)

If everything goes well, you should see the same kind of message in console output as above.

You should also receive an email to the address you’ve specified in the To property of the SendGrid attribute. The title will be as WebJob – Queue message processed successfully, and the body will contain the message coming from the queue like the following: The message ‘My queue test message’ was successfully processed.


To go further

If you want to send more than one email, we can use the WebJob IAsyncCollector like the following:

public static async Task ProcessQueueMessage([QueueTrigger("queue")] string message, TextWriter log, [SendGrid(From = "no-reply@anydomainxyz.com", To = "anybody@anydomainxyz.com")] IAsyncCollector mails)

There are many other ways to send emails from the extension, more details can be found here:

SendGrid Extension Samples


Summary

We have seen how to send emails from an Azure WebJob using the SendGrid extension.


You can download the example solution here:

Download full sources

Or

Browse the GitHub repository

(Note that the project uses Microsoft.Azure.WebJobs version 2.0.0)


Please feel free to comment or contact me if you have any question about this article.

Categories
App Service Azure Microsoft Notification Hubs extension WebJobs

Sending push notifications in Azure WebJobs with Azure Notification Hubs extension

In a simple scenario we will discover how to send a push notification to FCM/GCM in an Azure WebJob.

After several months in Beta, Azure WebJobs SDK 2.0 has been released March 1st 2017:

Azure WebJobs SDK 2.0 released

Along with this release several new extensions are now available. Today we will take a look at the version 1.0 of the following:

WebJobs Notification Hubs extension


Thanks to this extension, sending push notifications from an Azure WebJob become an easy task.

In this article, we will discover how to send a FCM/GCM (Firebase Cloud Messaging/Google Cloud Messaging) notification from an Azure WebJob with the Azure Notification Hubs extension. As a base, we will create a project with the Azure WebJob template in Visual Studio.


Creation

The first thing you will need is an Azure Notification Hub deployed on Azure. If don’t know how, you can quickly deploy one with ARM template. Everything is detailed for you in a previous article.


Once your Notification Hub deployed and setup, add the following NuGet package to your project: Microsoft.Azure.WebJobs.Extensions.NotificationHubs


To enable the Notifications Hubs extension in your WebJob you will need to configure the JobHostConfiguration like the following:

using Microsoft.Azure.WebJobs;

namespace AzureWebJobs.NotificationHubExtension
{
	// To learn more about Microsoft Azure WebJobs SDK, please see https://go.microsoft.com/fwlink/?LinkID=320976
	class Program
	{
		// Please set the following connection strings in app.config for this WebJob to run:
		// AzureWebJobsDashboard and AzureWebJobsStorage
		static void Main()
		{
			var config = new JobHostConfiguration();

			if (config.IsDevelopment)
			{
				config.UseDevelopmentSettings();
			}

			config.UseNotificationHubs();

			var host = new JobHost(config);
			// The following code ensures that the WebJob will be running continuously
			host.RunAndBlock();
		}
	}
}

The important part here is to call the extension named UseNotificationHubs. This will enable the Notification Hubs extension.


We will now add two new application settings to be able to connect to Azure Notification Hubs:

<?xml version="1.0" encoding="utf-8"?>
<configuration>
  <connectionStrings>
    <!-- The format of the connection string is "DefaultEndpointsProtocol=https;AccountName=NAME;AccountKey=KEY" -->
    <!-- For local execution, the value can be set either in this config file or through environment variables -->
    <add name="AzureWebJobsDashboard" connectionString="" />
    <add name="AzureWebJobsStorage" connectionString="" />
  </connectionStrings>
  <appSettings>
    <add key="AzureWebJobsNotificationHubsConnectionString" value="Endpoint=sb://mynotifhubnamespace.servicebus.windows.net/;SharedAccessKeyName=DefaultFullSharedAccessSignature;SharedAccessKey=U3Mxxx" />
    <add key="AzureWebJobsNotificationHubName" value="myNotifHub" />
  </appSettings>
  <startup>
    <supportedRuntime version="v4.0" sku=".NETFramework,Version=v4.5.2" />
  </startup>
  <runtime>
    <assemblyBinding xmlns="urn:schemas-microsoft-com:asm.v1">
      <dependentAssembly>
        <assemblyIdentity name="Microsoft.Azure.KeyVault.Core" publicKeyToken="31bf3856ad364e35" culture="neutral" />
        <bindingRedirect oldVersion="0.0.0.0-2.0.0.0" newVersion="2.0.0.0" />
      </dependentAssembly>
      <dependentAssembly>
        <assemblyIdentity name="Microsoft.WindowsAzure.Storage" publicKeyToken="31bf3856ad364e35" culture="neutral" />
        <bindingRedirect oldVersion="0.0.0.0-8.1.1.0" newVersion="8.1.1.0" />
      </dependentAssembly>
      <dependentAssembly>
        <assemblyIdentity name="Newtonsoft.Json" publicKeyToken="30ad4fe6b2a6aeed" culture="neutral" />
        <bindingRedirect oldVersion="0.0.0.0-10.0.0.0" newVersion="10.0.0.0" />
      </dependentAssembly>
    </assemblyBinding>
  </runtime>
</configuration>
  • AzureWebJobsNotificationHubsConnectionString: the connection string of the Azure Notification Hub Namespace.
  • AzureWebJobsNotificationHubName: the name of the Azure Notification Hub.


Now using the default ProcessQueueMessage function that uses a QueueTrigger, we want to send a notification when a message is added to the queue:

using System.IO;
using AzureWebJobs.NotificationHubExtension.Extensions;
using Microsoft.Azure.NotificationHubs;
using Microsoft.Azure.WebJobs;

namespace AzureWebJobs.NotificationHubExtension
{
	public class Functions
	{
		// This function will get triggered/executed when a new message is written 
		// on an Azure Queue called queue.
		public static void ProcessQueueMessage([QueueTrigger("queue")] string message, TextWriter log, [NotificationHub] out Notification notification)
		{
			log.WriteLine(message);

			notification = new GcmNotification(message.ToGcmPayload());
		}
	}
}

You can notice two things here:

  • We use the NotificationHub attribute to be able to use Notification Hubs in the function.
  • The out contextual keyword with the notification parameter allow us to pass the GcmNotification to the extension that will then send the notification to Notification Hub.


Example of use

Once the WebJob ready and properly configured, we will launch it and add a message to the queue:

Found the following functions:
AzureWebJobs.NotificationHubExtension.Functions.ProcessQueueMessage
Job host started
Executing 'Functions.ProcessQueueMessage' (Reason='New queue message detected on 'queue'.', Id=f7767465-adb0-46d7-83f4-926f1c526074)
Notification Hub test notification from WebJob
Executed 'Functions.ProcessQueueMessage' (Succeeded, Id=f7767465-adb0-46d7-83f4-926f1c526074)

If everything goes well, you should see the same kind of message in console output as above.


The ToGcmPayload() extension will generate the following payload and will be sent in the notification:

"{\"data\":{\"message\":\"Notification Hub test notification\"}}"


To go further

If you want to send more than one notification, the out parameter can be an array of notification like the following:

public static void ProcessQueueMessage([QueueTrigger("queue")] string message, TextWriter log, [NotificationHub] out Notification[] notifications)

There are many other ways to send notifications from the extension like template notification, more details can be found here:

Notification Hubs Extension Samples


Summary

We have seen how to send a notification from an Azure WebJob using the Azure Notification Hubs extension.


You can download the example solution here:

Download full sources

Or

Browse the GitHub repository

(Note that the project uses Microsoft.Azure.WebJobs version 2.0.0)


Please feel free to comment or contact me if you have any question about this article.

Categories
Azure Microsoft

Take control of multi-platform push notifications with Azure Notification Hubs

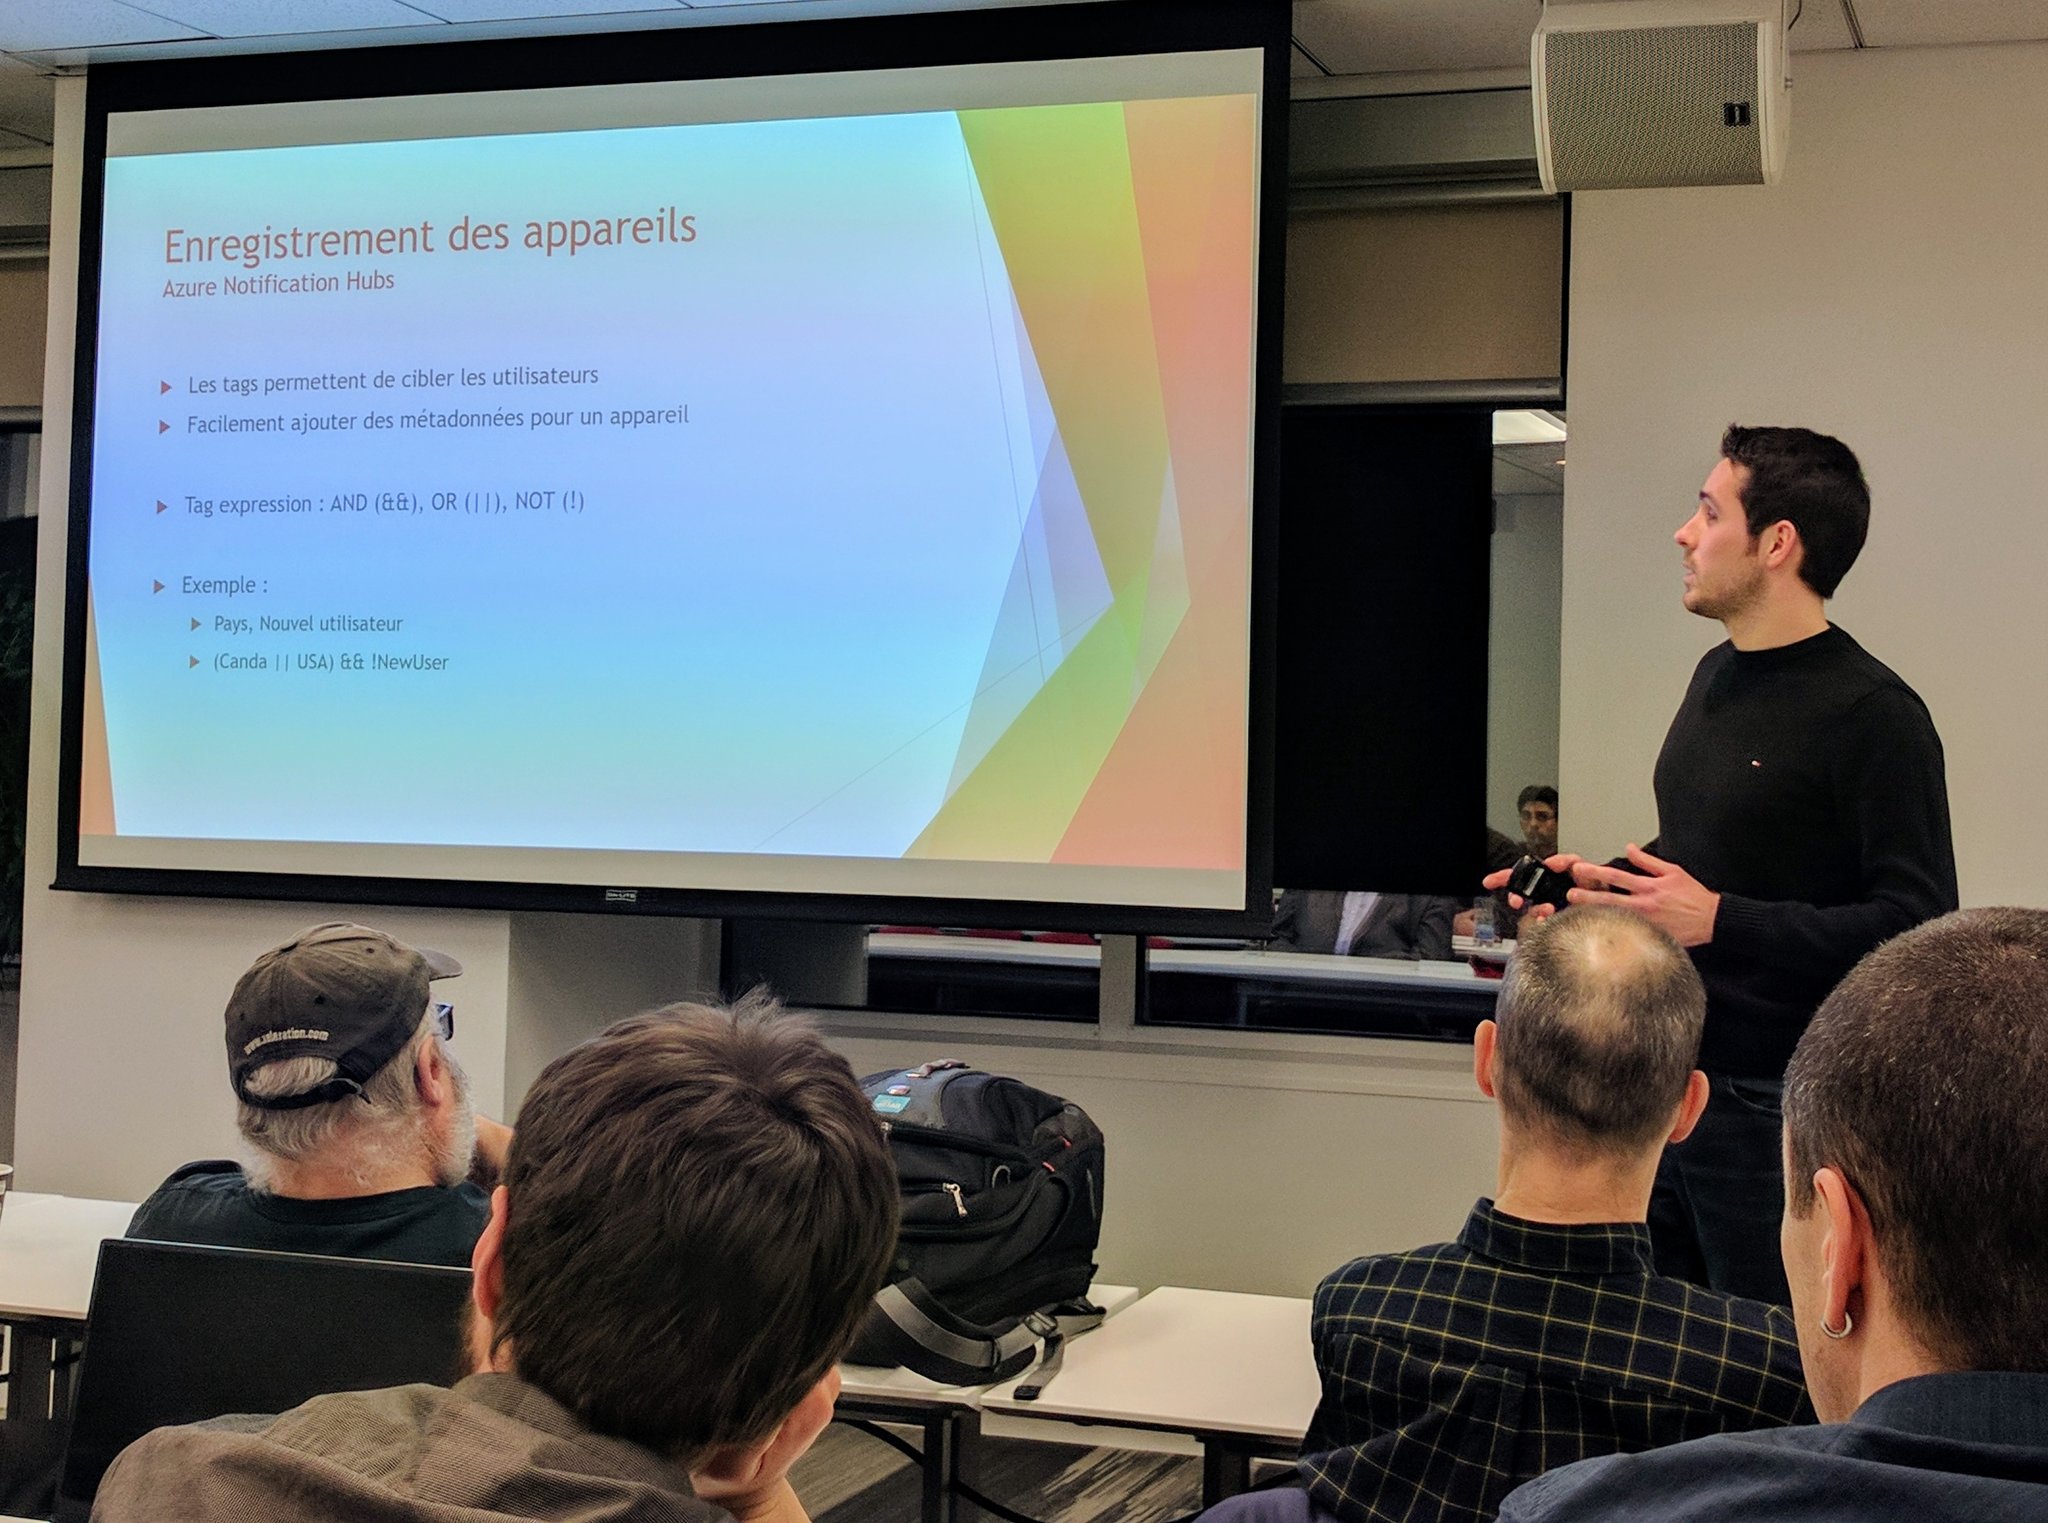
Msdevmtl Meetup at Microsoft Montreal (2000 McGill College Ave, Suite 550) Monday, March 20, 2017 6:30 PM

Thank you for attending this presentation!

You can find the source code of the demo project on GitHub:


As a reminder, the project is built around the following technologies:

  • Azure Notification Hubs
  • Azure WebJobs
  • ASP.NET Web API
  • Xamarin Android


Download the PowerPoint presentation in French below:


Please feel free to contact me if you have any question about the presentation or the project.


Join me March 20, 2017 6:30 PM at Microsoft Montreal for a presentation of Azure Notification Hubs!


Together we’ll see how Azure Notification Hubs can make your life easier by giving you the ability to easily send millions of messages across multiple platforms.

In this 60 minutes session, we will discover Azure Notification Hubs through a presentation which will show you the main lines of the product, how to set it up with the Azure portal but also via ARM template, then ending with a practical part and a concrete demonstration of use.


Please note that in the same evening François (Frank) Boucher will give a presentation about Azure Functions!

Categories
App Service Azure Microsoft

Deploying a web app and an Azure SQL database with ARM template without providing any password

Do you really need to provide a database password in the parameters of your ARM template?

Using an ARM template to create a Website and a SQL Database together is an easy task with Azure. However, each time you need to provide an SQL Admin username and password.

In a previous article, we’ve discovered how to automatically generate a password for an Azure SQL database with ARM template.

Today, following this article, we will learn how to deploy a web app in Azure App Service and an Azure SQL Database with ARM template without providing any password. Our ARM template will be created in a new Azure Resource Group deployment project in Visual Studio.


Creation

Let’s declare the parameters of the ARM template:

{
  "$schema": "https://schema.management.azure.com/schemas/2015-01-01/deploymentTemplate.json#",
  "contentVersion": "1.0.0.0",
  "parameters": {
    "databaseCollation": {
      "type": "string",
      "defaultValue": "SQL_Latin1_General_CP1_CI_AS"
    },
    "databaseEdition": {
      "type": "string",
      "defaultValue": "Basic",
      "allowedValues": [
        "Basic",
        "Standard",
        "Premium"
      ]
    },
    "databaseMaxSizeBytes": {
      "type": "string",
      "defaultValue": "1073741824"
    },
    "databaseRequestedServiceObjectiveName": {
      "type": "string",
      "defaultValue": "Basic",
      "allowedValues": [
        "Basic",
        "S0",
        "S1",
        "S2",
        "P1",
        "P2",
        "P3"
      ],
      "metadata": {
        "description": "Describes the performance level for Edition"
      }
    },
    "hostingPlanSkuName": {
      "type": "string",
      "defaultValue": "F1",
      "allowedValues": [
        "F1",
        "D1",
        "B1",
        "B2",
        "B3",
        "S1",
        "S2",
        "S3",
        "P1",
        "P2",
        "P3",
        "P4"
      ],
      "metadata": {
        "description": "Describes plan's pricing tier and instance size. Check details at https://azure.microsoft.com/en-us/pricing/details/app-service/"
      }
    },
    "hostingPlanSkuCapacity": {
      "type": "int",
      "defaultValue": 1,
      "minValue": 1,
      "metadata": {
        "description": "Describes plan's instance count"
      }
    }
  }
  ...
}
  • databaseCollation: the collation of the database, by default SQL_Latin1_General_CP1_CI_AS.
  • databaseEdition: the edition of the database, by default Basic.
  • databaseMaxSizeBytes: the size of database, by default 1GB.
  • databaseRequestedServiceObjectiveName: the pricing tier of the database, by default Basic.
  • hostingPlanSkuName: the pricing tier of the hosting plan, by default F1.
  • hostingPlanSkuCapacity: the hosting plan’s instance count, by default 1.


Now we will declare the variables of the ARM template:

{
  ...
  "variables": {
    "databaseName": "[concat('mydb', uniqueString(resourceGroup().id, 'E931CAC0-7259-4FA1-80B4-BD47CBA4E040'))]",
    "hostingPlanName": "[concat('myhostingPlan', uniqueString(resourceGroup().id))]",
    "sqlserverAdminLogin": "[concat('l', uniqueString(resourceGroup().id, '9A08DDB9-95A1-495F-9263-D89738ED4205'))]",
    "sqlserverAdminPassword": "[concat('P', uniqueString(resourceGroup().id, '224F5A8B-51DB-46A3-A7C8-59B0DD584A41'), 'x', '!')]",
    "sqlserverName": "[concat('mysqlserver', uniqueString(resourceGroup().id))]",
    "websiteName": "[concat('mywebsite', uniqueString(resourceGroup().id, '274ACF17-FF18-4DB2-B3A8-AABCA4CB7D54'))]"
  }
  ...
}

The variables were already described in the previous article, but here what we can pay attention to:

  • We use a lot the ARM template function uniqueString allowing us to create a deterministic hash string based on the values provided as parameters.
  • We are able to create a random database name, admin login, admin password, SQL server name.
  • The names will be unique for the resource group.
  • To make sure that we are compliant with the Azure SQL database policy “Your password must contain characters from three of the following categories – English uppercase letters, English lowercase letters, numbers (0-9), and non-alphanumeric characters (!, $, #, %, etc.)”, we insert one character for each category before and after the unique string.


And to finish we will declare the resources of the ARM template:

{
  ...
  "resources": [
    {
      "apiVersion": "2015-08-01",
      "name": "[variables('hostingPlanName')]",
      "type": "Microsoft.Web/serverfarms",
      "location": "[resourceGroup().location]",
      "properties": {
        "name": "[variables('hostingPlanName')]"
      },
      "sku": {
        "name": "[parameters('hostingPlanSkuName')]",
        "capacity": "[parameters('hostingPlanSkuCapacity')]"
      },
      "tags": {
        "displayName": "HostingPlan"
      }
    },
    {
      "apiVersion": "2014-04-01-preview",
      "name": "[variables('sqlserverName')]",
      "type": "Microsoft.Sql/servers",
      "location": "[resourceGroup().location]",
      "properties": {
        "administratorLogin": "[variables('sqlserverAdminLogin')]",
        "administratorLoginPassword": "[variables('sqlserverAdminPassword')]"
      },
      "tags": {
        "displayName": "SqlServer"
      },
      "resources": [
        {
          "apiVersion": "2014-04-01-preview",
          "name": "[variables('databaseName')]",
          "type": "databases",
          "location": "[resourceGroup().location]",
          "dependsOn": [
            "[concat('Microsoft.Sql/servers/', variables('sqlserverName'))]"
          ],
          "properties": {
            "edition": "[parameters('databaseEdition')]",
            "collation": "[parameters('databaseCollation')]",
            "maxSizeBytes": "[parameters('databaseMaxSizeBytes')]",
            "requestedServiceObjectiveName": "[parameters('databaseRequestedServiceObjectiveName')]"
          },
          "tags": {
            "displayName": "Database"
          }
        },
        {
          "apiVersion": "2014-04-01-preview",
          "name": "AllowAllWindowsAzureIps",
          "type": "firewallrules",
          "location": "[resourceGroup().location]",
          "dependsOn": [
            "[resourceId('Microsoft.Sql/servers', variables('sqlserverName'))]"
          ],
          "properties": {
            "startIpAddress": "0.0.0.0",
            "endIpAddress": "0.0.0.0"
          }
        }
      ]
    },
    {
      "apiVersion": "2015-08-01",
      "name": "[variables('websiteName')]",
      "type": "Microsoft.Web/sites",
      "location": "[resourceGroup().location]",
      "dependsOn": [
        "[concat('Microsoft.Web/serverFarms/', variables('hostingPlanName'))]"
      ],
      "properties": {
        "name": "[variables('websiteName')]",
        "serverFarmId": "[resourceId('Microsoft.Web/serverfarms', variables('hostingPlanName'))]"
      },
      "tags": {
        "[concat('hidden-related:', resourceGroup().id, '/providers/Microsoft.Web/serverfarms/', variables('hostingPlanName'))]": "empty",
        "displayName": "Website"
      },
      "resources": [
        {
          "apiVersion": "2015-08-01",
          "name": "connectionstrings",
          "type": "config",
          "dependsOn": [
            "[resourceId('Microsoft.Web/sites', variables('websiteName'))]"
          ],
          "properties": {
            "MyDbConnectionString": {
              "value": "[concat('Data Source=tcp:', reference(concat('Microsoft.Sql/servers/', variables('sqlserverName'))).fullyQualifiedDomainName, ',1433;Initial Catalog=', variables('databaseName'), ';User Id=', variables('sqlserverAdminLogin'), '@', variables('sqlserverName'), ';Password=', variables('sqlserverAdminPassword'), ';')]",
              "type": "SQLServer"
            }
          }
        }
      ]
    }
  ]
  ...
}

Here we declare the website, the SQL Server and its database:

  • As you can notice, we are declaring the connection strings of the website.
  • We are setting the complete connection string MyDbConnectionString for our database using the generated password.


Example of use

The ARM template is now ready, let’s open a Windows PowerShell and try it:

.\Deploy-AzureResourceGroup.ps1 -ResourceGroupName 'MyResourceGroupName' -ResourceGroupLocation 'canadaeast' -TemplateFile '.\azuredeploy.json'

...

Resource Microsoft.Sql/servers/databases 'mysqlserverdprkifjzxpany/mydbodsrno26t2xnk' provisioning status is succeeded

If everything goes well, you should see the same kind of message as above.


To go further

If you check the application settings via the portal, the connection string will look like the following:

MyDbConnectionString = Data Source=tcp:mysqlserverdprkifjzxpany.database.windows.net,1433;Initial Catalog=mydbodsrno26t2xnk;User Id=lgjytuqjz44e7s@mysqlserverdprkifjzxpany;Password=Pxhhg2lv4jbx2qx!;


As no user needs to know the password, you could enforce the security by changing the password on every deployment using the deployment name in the ARM template function uniqueString. Change the password variable as following:

"sqlserverAdminPassword": "[concat('P', uniqueString(resourceGroup().id, deployment().name, '224F5A8B-51DB-46A3-A7C8-59B0DD584A41'), 'x', '!')]"


Summary

You can’t access the SQL database as you don’t know the generated password but the web app can access it and that’s what we want. Now via Entity Framework Code First for example, your web application would now be able to create the database tables.

We have seen how to create an ARM template that will deploy a web app and an Azure SQL database without providing any password.


You can download the example solution here:

Download full sources

Or

Browse the GitHub repository


Please feel free to comment or contact me if you have any question about this article.

Categories
Azure Microsoft

Passed Exam 70-532: Developing Microsoft Azure Solutions

Now is a good time to validate your Azure skills!

I’ve been developing with Azure for a while and this week I made the jump into passing my first Azure certification with Exam 70-532 in order to validate my skills.


Passing the exam and result

I scheduled an online proctored exam and after two and an half hours I successfully passed the exam at the first shot! The pool of questions is very large and case studies were interesting. Yes as often there are some tricky questions but overall it has been a great way to validate my knowledge.

Also if you jumped on the Azure train late and never had the opportunity to work with Cloud Services such as Web Role or Worker Role this want prevent you from passing this exam. As Azure is evolving every day, the exam was updated recently to reflect the new services. To maximize your chances I would advise you to at least know and understand Cloud Services.


Take advantage of the current offer

The current Azure certification offer is really interesting if you want to pass any of the following exam: 70-473, 70-475, 70-532, 70-533 and 70-534.

For USD $99 receive one voucher or three vouchers for USD $279. Each voucher will allow you to:

  • Pass one exam
  • Have one exam retake in case you fail your first attempt
  • Get the Microsoft Official Practice Test for the exam

Considering that a single exam itself is usually USD $165, this offer valid until 6/30/2017 is great if you want to validate your Azure skills!


Take advantage of the current offer

It’s always rewarding to get an exam, receive a badge and I encourage you to go ahead in validating your Azure knowledge.


Please feel free to comment or contact me if you have any question. Of course don’t ask me about to the content of the exam, as you know Non-Disclosure Agreement apply for Microsoft Certification Exams.

Categories
Azure Microsoft SQL Database

Automatically generate a password for an Azure SQL database with ARM template

Do you really need to know your database password?

Creating an Azure SQL Database with ARM Template is a fairly common task. For that you’ll have to provide an admin login and password via the parameters of the ARM template. This task can be done by a single developer or in an automated flow via Continuous Deployment for example.

While a single developer may need to access the database with an application such as SQL Server Management Studio and has the need to know the database password for testing purposes, you could ask yourself if it’s relevant to save this password in an automated environment.

When a QA, Staging or Production environment is deployed who really as the need to access the database except your application? Does a person needs to access the database and know the password?

At the end when deploying to environments, you can ask yourself the following question:

Do you really need to know your database password?

Today we will discover how to automatically generate a password for an Azure SQL database via an Azure Resource Manager template. Our ARM template will be created in a new Azure Resource Group deployment project in Visual Studio.


Creation

Let’s declare the parameters of the ARM template:

{
  "$schema": "https://schema.management.azure.com/schemas/2015-01-01/deploymentTemplate.json#",
  "contentVersion": "1.0.0.0",
  "parameters": {
    "databaseCollation": {
      "type": "string",
      "defaultValue": "SQL_Latin1_General_CP1_CI_AS"
    },
    "databaseEdition": {
      "type": "string",
      "defaultValue": "Basic",
      "allowedValues": [
        "Basic",
        "Standard",
        "Premium"
      ]
    },
    "databaseMaxSizeBytes": {
      "type": "string",
      "defaultValue": "1073741824"
    },
    "databaseRequestedServiceObjectiveName": {
      "type": "string",
      "defaultValue": "Basic",
      "allowedValues": [
        "Basic",
        "S0",
        "S1",
        "S2",
        "P1",
        "P2",
        "P3"
      ],
      "metadata": {
        "description": "Describes the performance level for Edition"
      }
    }
  }
  ...
}
  • databaseCollation: the collation of the database, by default SQL_Latin1_General_CP1_CI_AS.
  • databaseEdition: the edition of the database, by default Basic.
  • databaseMaxSizeBytes: the size of database, by default 1GB.
  • databaseRequestedServiceObjectiveName: the pricing tier of the database, by default Basic.


Now we will declare the variables of the ARM template and here comes the interesting part:

{
  ...
  "variables": {
    "databaseName": "[concat('mydb', uniqueString(resourceGroup().id, 'E931CAC0-7259-4FA1-80B4-BD47CBA4E040'))]",
    "sqlserverAdminLogin": "[concat('l', uniqueString(resourceGroup().id, '9A08DDB9-95A1-495F-9263-D89738ED4205'))]",
    "sqlserverAdminPassword": "[concat('P', uniqueString(resourceGroup().id, '224F5A8B-51DB-46A3-A7C8-59B0DD584A41'), 'x', '!')]",
    "sqlserverName": "[concat('mysqlserver', uniqueString(resourceGroup().id))]"
  }
  ...
}

We can pay attention to several things here:

  • We use a lot the ARM template function uniqueString allowing us to create a deterministic hash string based on the values provided as parameters.
  • We are able to create a random database name, admin login, admin password, SQL server name.
  • The names will be unique for the resource group.
  • To make sure that we are compliant with the Azure SQL database policy “Your password must contain characters from three of the following categories – English uppercase letters, English lowercase letters, numbers (0-9), and non-alphanumeric characters (!, $, #, %, etc.)”, we insert one character for each category before and after the unique string.


And to finish we will declare the resources of the ARM template:

{
  ...
  "resources": [
    {
      "apiVersion": "2014-04-01-preview",
      "name": "[variables('sqlserverName')]",
      "type": "Microsoft.Sql/servers",
      "location": "[resourceGroup().location]",
      "properties": {
        "administratorLogin": "[variables('sqlserverAdminLogin')]",
        "administratorLoginPassword": "[variables('sqlserverAdminPassword')]"
      },
      "tags": {
        "displayName": "SqlServer"
      },
      "resources": [
        {
          "apiVersion": "2014-04-01-preview",
          "name": "[variables('databaseName')]",
          "type": "databases",
          "location": "[resourceGroup().location]",
          "dependsOn": [
            "[concat('Microsoft.Sql/servers/', variables('sqlserverName'))]"
          ],
          "properties": {
            "edition": "[parameters('databaseEdition')]",
            "collation": "[parameters('databaseCollation')]",
            "maxSizeBytes": "[parameters('databaseMaxSizeBytes')]",
            "requestedServiceObjectiveName": "[parameters('databaseRequestedServiceObjectiveName')]"
          },
          "tags": {
            "displayName": "Database"
          }
        },
        {
          "apiVersion": "2014-04-01-preview",
          "name": "AllowAllWindowsAzureIps",
          "type": "firewallrules",
          "location": "[resourceGroup().location]",
          "dependsOn": [
            "[resourceId('Microsoft.Sql/servers', variables('sqlserverName'))]"
          ],
          "properties": {
            "startIpAddress": "0.0.0.0",
            "endIpAddress": "0.0.0.0"
          }
        }
      ]
    }
  ]
  ...
}

Here nothing new as it is an usual way to declare a SQL Server and its database.


Example of use

The ARM template is now ready, let’s open a Windows PowerShell and try it:

.\Deploy-AzureResourceGroup.ps1 -ResourceGroupName 'MyResourceGroupName' -ResourceGroupLocation 'canadaeast' -TemplateFile '.\azuredeploy.json'

...

Resource Microsoft.Sql/servers/databases 'mysqlserverlugjlio5wdu64/mydbz3uejht5n74jk' provisioning status is succeeded

If everything goes well, you should see the same kind of message as above.


To go further

If you get the database connection string it will look like the following:

Data Source=tcp:'mysqlserverlugjlio5wdu64.database.windows.net,1433;Initial Catalog=mydbz3uejht5n74jk;User Id=lbkxzpxo3blcg4g@mysqlserverlugjlio5wdu64;Password=P77qwhg25nihlox!;


As no user needs to know the password, you could enforce the security by changing the password on every deployment using the deployment name in the ARM template function uniqueString. Change the password variable as following:

"sqlserverAdminPassword": "[concat('P', uniqueString(resourceGroup().id, deployment().name, '224F5A8B-51DB-46A3-A7C8-59B0DD584A41'), 'x', '!')]"


Summary

We have seen how to create an ARM template that will create an Azure SQL database with an automatically generated password.


Now you have a database, but you can’t access it as you don’t know the generated password. But again, you don’t to know this password while the web app you will deploy along with the database in the ARM template needs to know it. Well we will discover how together in my next article, stay tuned!


You can download the example solution here:

Download full sources

Or

Browse the GitHub repository


Please feel free to comment or contact me if you have any question about this article.

Categories
App Service Azure Microsoft WebJobs

Job Handlers and Dependency Injection in Azure WebJobs

In the series of articles about Microsoft Azure WebJob and Dependency Injection, we will learn how to process a function with a Job Handler.

In a previous article we discovered in an advanced scenario how to implement Dependency Injection and Dependency Scope per job in Azure WebJobs with Unity.

Today in this last article in the series of articles about Microsoft Azure WebJob, we will discover how to process a function using a Job Handler.


Creation

Let’s continue with the source code created in the previous article by creating the following interface:

using System.IO;
using System.Threading;
using System.Threading.Tasks;

namespace AzureWebJobs.JobActivatorUnity.Contracts
{
    public interface IQueueMessageJob
    {
        Task Process(CancellationToken ct, string message, TextWriter log);
    }
}


Now we will create the implementation of it:

using System;
using System.IO;
using System.Threading;
using System.Threading.Tasks;
using AzureWebJobs.JobActivatorUnity.Contracts;

namespace AzureWebJobs.JobActivatorUnity.Handlers
{
    public sealed class QueueMessageJobHandler : IQueueMessageJob
    {
        private readonly INumberService numberService;
        private readonly IUnitOfWork unitOfWork;

        public QueueMessageJobHandler(INumberService numberService, IUnitOfWork unitOfWork)
        {
            if (numberService == null) throw new ArgumentNullException(nameof(numberService));
            if (unitOfWork == null) throw new ArgumentNullException(nameof(unitOfWork));

            this.numberService = numberService;
            this.unitOfWork = unitOfWork;
        }

        public async Task Process(CancellationToken ct, string message, TextWriter log)
        {
            Console.WriteLine("Beginning QueueMessageJobHandler work...");

            log.WriteLine("New random number {0} from number service for message: {1}", this.numberService.GetRandomNumber(), message);

            await this.unitOfWork.DoWork(ct, message);

            Console.WriteLine("Finishing QueueMessageJobHandler work...");
        }
    }
}

As you can notice we moved the code previously in the function to the Job Handler process method.


Example of use

We have created the QueueMessageJobHandler and we will learn how to use it.


First we will register it in the Unity container:

using System;
using AzureWebJobs.JobActivatorUnity.Contracts;
using AzureWebJobs.JobActivatorUnity.Dependencies;
using AzureWebJobs.JobActivatorUnity.Handlers;
using AzureWebJobs.JobActivatorUnity.Services;
using AzureWebJobs.JobActivatorUnity.Unity;
using Microsoft.Practices.Unity;

namespace AzureWebJobs.JobActivatorUnity
{
    public class UnityConfig
    {
        #region Unity Container
        private static Lazy<IUnityContainer> container = new Lazy<IUnityContainer>(() =>
        {
            var container = new UnityContainer();
            RegisterTypes(container);
            return container;
        });

        /// <summary>
        /// Gets the configured Unity container.
        /// </summary>
        public static IUnityContainer GetConfiguredContainer()
        {
            return container.Value;
        }
        #endregion

        /// <summary>Registers the type mappings with the Unity container.</summary>
        /// <param name="container">The unity container to configure.</param>
        public static void RegisterTypes(IUnityContainer container)
        {
            container.RegisterType<IJobActivatorDependencyResolver, UnityJobActivatorHierarchicalDependencyResolver>(new ContainerControlledLifetimeManager(), new InjectionConstructor(container.CreateChildContainer()));
            container.RegisterType<INumberService, NumberService>(new ContainerControlledLifetimeManager());
            container.RegisterType<IQueueMessageJob, QueueMessageJobHandler>(new HierarchicalLifetimeManager());
            container.RegisterType<IUnitOfWork, DisposableService>(new HierarchicalLifetimeManager());
        }
    }
}

Here we register the Job Handler along with the other services.


In our job function we can now use the IQueueMessageJob:

using System;
using System.IO;
using System.Threading;
using System.Threading.Tasks;
using AzureWebJobs.JobActivatorUnity.Contracts;
using AzureWebJobs.JobActivatorUnity.Dependencies;
using Microsoft.Azure.WebJobs;

namespace AzureWebJobs.JobActivatorUnity
{
    public class Functions
    {
        private readonly IJobActivatorDependencyResolver jobActivatorDependencyResolver;

        public Functions(IJobActivatorDependencyResolver jobActivatorDependencyResolver)
        {
            if (jobActivatorDependencyResolver == null) throw new ArgumentNullException(nameof(jobActivatorDependencyResolver));

            this.jobActivatorDependencyResolver = jobActivatorDependencyResolver;
        }

        // This function will get triggered/executed when a new message is written 
        // on an Azure Queue called queue.
        public async Task ProcessQueueMessage([QueueTrigger("queue")] string message, TextWriter log, CancellationToken ct)
        {
            using (var scope = this.jobActivatorDependencyResolver.BeginScope())
            {
                await scope.CreateInstance<IQueueMessageJob>().Process(ct, message, log);
            }
        }
    }
}

We can pay attention to several things here:

  • The function is simplified and all the work is now done in the Job Handler.
  • The job is processed in its own scope.
  • We call CreateInstance<IQueueMessageJob>() once, all the dependencies will be automatically injected by Unity in the implementation.
  • All the instances created inside the scope will be disposed immediately before the function ends.


To go further

If you test the source code, the console output will be the following when the function is triggered:

Executing: 'Functions.ProcessQueueMessage' - Reason: 'New queue message detected on 'queue'.'
Beginning QueueMessageJobHandler work...
DisposableService doing work...
Finishing QueueMessageJobHandler work...
DisposableService disposing...
Executed: 'Functions.ProcessQueueMessage' (Succeeded)

Right after the Job Handler work is done, the disposable service is disposed.


Summary

We have seen how to create a Job Handler for a Microsoft Azure WebJob function which completes the series of articles about Microsoft Azure WebJob and Dependency Injection.


You can download the example solution here:

Download full sources

Or

Browse the GitHub repository

(Note that the project uses Microsoft.Azure.WebJobs version 1.1.2)


Please feel free to comment or contact me if you have any question about this article.

Categories
App Service Azure Microsoft

Create SSL binding to an app custom domain in Azure App Service with ARM template

In the series of articles about ARM template, we will learn to create a template to secure a custom domain with SSL.

Via the Azure portal you can create an SSL binding with Azure App Service. When selecting SSL certificates in an App Service then Add binding, you can bind a custom domain with a certificate.

Today we will discover how to manage this operation via an Azure Resource Manager template. Our ARM template will be created in a new Azure Resource Group deployment project in Visual Studio.


Creation

{
  "$schema": "https://schema.management.azure.com/schemas/2015-01-01/deploymentTemplate.json#",
  "contentVersion": "1.0.0.0",
  "parameters": {
    "websiteName": {
      "type": "string"
    },
    "websiteCustomDomainName": {
      "type": "string"
    },
    "certificateThumbprint": {
      "type": "string"
    }
  }
  ...
}
  • websiteName: the name of the azure app service such as myappname.azurewebsites.net.
  • websiteCustomDomainName: the name of the custom domain such as mycustomdomain.com.
  • certificateThumbprint: the thumbprint of the certificate to bind such as 22XXBE10XXE5D2DBAD29DXXXX7.


Now we will declare the resources of the ARM template:

{
  ...
  "resources": [
    {
      "apiVersion": "2015-08-01",
      "name": "[parameters('websiteName')]",
      "type": "Microsoft.Web/sites",
      "location": "[resourceGroup().location]",
      "properties": {
        "hostNameSslStates": [
          {
            "name": "[parameters('websiteCustomDomainName')]",
            "sslState": "SniEnabled",
            "thumbprint": "[parameters('certificateThumbprint')]",
            "toUpdate": true
          }
        ]
      }
    }
  ]
  ...
}

We can pay attention to several things here:

  • The SSL binding is made via a property of the website named: hostNameSslStates.
  • One or multiple hostNameSslStates can be declared.
  • Each hostNameSslState have name property corresponding to the custom domain name and thumbprint property corresponding to the certificate thumbprint that will be binded.


Example of use

The ARM template is now ready, let’s open a Windows PowerShell and try it:

.\Deploy-AzureResourceGroup.ps1 -ResourceGroupName 'MyResourceGroupName' -ResourceGroupLocation 'canadaeast' -TemplateFile '.\azuredeploy.json'

...

Resource Microsoft.Web/sites 'myappname' provisioning status is succeeded

If everything goes well, you should see the same kind of message as above.


To go further

To be able to perform the binding operation you first need to add the custom domain name to the app as seen in a previous article. If the custom domain is not added first you’ll get the following error message:

Resource Microsoft.Web/sites ‘myappname’ failed with message ‘Hostname ‘mycustomdomain.com’ does not exist’.


Summary

We have seen how to create an ARM template that will create an SSL binding to an app custom domain in Azure App Service.


You can download the example solution here:

Download full sources

Or

Browse the GitHub repository


Please feel free to comment or contact me if you have any question about this article.