In the series of articles about ARM template, we will learn to create a template to secure a custom domain with SSL.
Via the Azure portal you can create an SSL binding with Azure App Service. When selecting SSL certificates in an App Service then Add binding, you can bind a custom domain with a certificate.
Today we will discover how to manage this operation via an Azure Resource Manager template. Our ARM template will be created in a new Azure Resource Group deployment project in Visual Studio.
The SSL binding is made via a property of the website named: hostNameSslStates.
One or multiple hostNameSslStates can be declared.
Each hostNameSslState have name property corresponding to the custom domain name and thumbprint property corresponding to the certificate thumbprint that will be binded.
Example of use
The ARM template is now ready, let’s open a Windows PowerShell and try it:
.\Deploy-AzureResourceGroup.ps1-ResourceGroupName 'MyResourceGroupName'-ResourceGroupLocation 'canadaeast'-TemplateFile '.\azuredeploy.json'...Resource Microsoft.Web/sites 'myappname' provisioning status is succeeded
If everything goes well, you should see the same kind of message as above.
To go further
To be able to perform the binding operation you first need to add the custom domain name to the app as seen in a previous article. If the custom domain is not added first you’ll get the following error message:
Resource Microsoft.Web/sites ‘myappname’ failed with message ‘Hostname ‘mycustomdomain.com’ does not exist’.
Summary
We have seen how to create an ARM template that will create an SSL binding to an app custom domain in Azure App Service.
In this article we will create an ARM template that will deploy a web certificate to an Azure resource group and output the certificate thumbprint.
Adding an SSL certificate to an app with Azure App Service can be achieved via the Azure portal. When selecting SSL certificates in an App Service then Upload Certificate, you can upload a PFX Certificate File with the associated Certificate password. The certificate will then be added to the resource group and will be available to create a binding with the application.
In today’s article we will discover how to manage this operation via an Azure Resource Manager template. Our ARM template will be created in a new Azure Resource Group deployment project in Visual Studio.
The certificate name is the concatenation of the prefix name and a unique string based on the resource group id. Depending on your needs you can adapt it.
The certificate is declared with the following type: Microsoft.Web/certificates.
And to finish we will output the certificate thumbprint:
As you can notice, we take advantage of the ARM template function providers. This function is useful to get the latest API version for a specific namespace.
Example of use
The ARM template is now ready, let’s open a Windows PowerShell and try it:
.\Deploy-AzureResourceGroup.ps1-ResourceGroupName 'MyResourceGroupName'-ResourceGroupLocation 'canadaeast'-TemplateFile '.\azuredeploy.json'...OutputsString : Name Type Value================================================== certificateThumbprint String 22XXBE10XXE5D2DBAD29DXXXX75510583XXXXXE2
If everything goes well, you should see the same kind of message as above.
To go further
In the template you need the certificate PFX file bytes converted to a base 64 string. Here is a simple PowerShell script that will take the file path of a PFX file and output it as base64 string in a file:
Today we will focus on creating an Azure Resource Manager template to easily add a custom domain to an app. For our ARM template to work properly, it is first required to create the DNS record and the website.
The custom domain is declared with the following type: Microsoft.Web/sites/hostNameBindings.
The name of the resource is a concatenation of the website name and the custom domain name.
Example of use
The ARM template is now ready, let’s open a Windows PowerShell and try it:
.\Deploy-AzureResourceGroup.ps1-ResourceGroupName 'MyResourceGroupName'-ResourceGroupLocation 'canadaeast'-TemplateFile '.\azuredeploy.json'...Resource Microsoft.Web/sites/hostNameBindings 'myappname/mycustomdomain.com' provisioning status is succeeded
If everything goes well, you should see the same kind of message as above.
To go further
If the DNS record is not created when deploying the template you’ll get the following error message:
A CNAME record pointing from mycustomdomain.com to myappname.azurewebsites.net was not found. Alternative record awverify.mycustomdomain.com to awverify.myappname.azurewebsites.net was not found either.
Summary
We have seen how to create an ARM template that will add a custom domain in Azure App Service.
In this article we will create an ARM template that will deploy a Notification Hub and output the primary connection string.
Sending push notifications to your mobile application can require a lot of development and maintenance. Fortunately in all the Azure products, one will help you to send push notifications cross-platform with minimum efforts: Azure Notification Hubs.
Today we will focus on creating an Azure Resource Manager template to easily setup and deploy a Notification Hub to a resource group. Our ARM template will be created in a new Azure Resource Group deployment project in Visual Studio.
notificationHubNamespaceName: the name of the Notification Hub namespace. If no parameter is provided a default name such as myNotifHubNsesf262thj4rr6 is generated.
notificationHubName: the name of the Notification Hub. If no parameter is provided a default name such as myNotifHubesf262thj4rr6 is generated.
notificationHubSkuName: the pricing tier of the Notification Hub. If no parameter is provided the pricing tier will be free.
Now we will declare the resources composed by the Notification Hub namespace and the Notification Hub:
The function providers is useful to get the latest API version for a specific namespace, whereas listkeys is the function that will allow us to get the properties for a specific key name.
By default when a new hub is created, two access keys are created: DefaultListenSharedAccessSignature and DefaultFullSharedAccessSignature. In our template we retrieve the primary connection string for the second one.
Example of use
The ARM template is now ready, let’s open a Windows PowerShell and try it:
.\Deploy-AzureResourceGroup.ps1-ResourceGroupName 'MyResourceGroupName'-ResourceGroupLocation 'canadaeast'-TemplateFile '.\azuredeploy.json'...OutputsString : Name Type Value================================================== notificationHubNamespaceConnectionString String Endpoint=sb://mynotifhubnsjibxupcseloca.servicebus.windows.net/;SharedAccessKeyName=DefaultFullSharedAccessSignature;SharedAccessKey=b0zOZuqc/mvrcLq8M49mfLomHBw4PH56uazMM/8r22Q=
If everything goes well, you should see the same kind of message as above.
To go further
In the template we are outputting the connection string as an example. But in a more advance scenario with a Website you could directly set the application setting that require the connection string like the following:
In this article we will discover in a simple scenario how to use Unity in a Microsoft Azure WebJob.
In a previous article we discovered in a simple scenario how to use Unity in a Microsoft Azure WebJob by creating a custom IJobActivator.
Continuing this article, today we will answer the following question:
How can I get a dependency scope only for the lifetime of my function?
This question might come up for example in a scenario where you need to reach a database in a function. In this kind of scenario you want to create a DbContext, query the database, close the connection, dispose all the resources properly, same as you would do in a web application with an HTTP request. Why? Because you don’t want to end up creating a DbContext per job not knowing when everything will be disposed, you want to have the control on the dependencies lifetime.
Creation
Let’s continue with the source code created in the previous article by creating the following interface:
using System;namespace AzureWebJobs.JobActivatorUnity.Dependencies{publicinterface IJobActivatorDependencyResolver : IDisposable{ IJobActivatorDependencyScope BeginScope();}}
Now we will create the Unity implementation of it:
using System;using AzureWebJobs.JobActivatorUnity.Dependencies;using Microsoft.Practices.Unity;namespace AzureWebJobs.JobActivatorUnity.Unity{publicclassUnityJobActivatorHierarchicalDependencyResolver: IJobActivatorDependencyResolver{privatereadonly IUnityContainer container;publicUnityJobActivatorHierarchicalDependencyResolver(IUnityContainer container){if(container==null)thrownew ArgumentNullException("container");this.container=container;}public IJobActivatorDependencyScope BeginScope(){returnnew UnityJobActivatorHierarchicalDependencyScope(this.container);}publicvoidDispose(){this.container.Dispose();}privatesealedclassUnityJobActivatorHierarchicalDependencyScope: IJobActivatorDependencyScope{privatereadonly IUnityContainer container;publicUnityJobActivatorHierarchicalDependencyScope(IUnityContainer parentContainer){this.container=parentContainer.CreateChildContainer();}public T CreateInstance<T>(){returnthis.container.Resolve<T>();}publicvoidDispose(){this.container.Dispose();}}}}
Thanks to this implementation every time a new scope is created a specific child container is created.
Example of use
We have created a JobActivatorDependencyResolver and we will learn how to use it.
First we will register it in the Unity container along with a disposable service:
using System;using AzureWebJobs.JobActivatorUnity.Contracts;using AzureWebJobs.JobActivatorUnity.Dependencies;using AzureWebJobs.JobActivatorUnity.Services;using AzureWebJobs.JobActivatorUnity.Unity;using Microsoft.Practices.Unity;namespace AzureWebJobs.JobActivatorUnity{publicclassUnityConfig{#regionUnity Containerprivatestatic Lazy<IUnityContainer> container =new Lazy<IUnityContainer>(()=>{var container =new UnityContainer();RegisterTypes(container);returncontainer;});/// <summary>/// Gets the configured Unity container./// </summary>publicstatic IUnityContainer GetConfiguredContainer(){returncontainer.Value;}#endregion/// <summary>Registers the type mappings with the Unity container.</summary>/// <paramname="container">The unity container to configure.</param>publicstaticvoidRegisterTypes(IUnityContainer container){container.RegisterType<IJobActivatorDependencyResolver, UnityJobActivatorHierarchicalDependencyResolver>(new ContainerControlledLifetimeManager(),new InjectionConstructor(container.CreateChildContainer()));container.RegisterType<INumberService, NumberService>(new ContainerControlledLifetimeManager());container.RegisterType<IUnitOfWork, DisposableService>(new HierarchicalLifetimeManager());}}}
You can notice two elements here:
We configure the dependency resolver to be a singleton.
We provide the dependency resolver with its own child container. All the scopes created will be under this container.
In our job function we can now use the IJobActivatorDependencyResolver:
using System;using System.IO;using System.Threading;using System.Threading.Tasks;using AzureWebJobs.JobActivatorUnity.Contracts;using AzureWebJobs.JobActivatorUnity.Dependencies;using Microsoft.Azure.WebJobs;namespace AzureWebJobs.JobActivatorUnity{publicclassFunctions{privatereadonly IJobActivatorDependencyResolver jobActivatorDependencyResolver;privatereadonly INumberService numberService;publicFunctions(IJobActivatorDependencyResolver jobActivatorDependencyResolver, INumberService numberService){if(jobActivatorDependencyResolver==null)thrownew ArgumentNullException("jobActivatorDependencyResolver");if(numberService==null)thrownew ArgumentNullException("numberService");this.jobActivatorDependencyResolver=jobActivatorDependencyResolver;this.numberService=numberService;}// This function will get triggered/executed when a new message is written // on an Azure Queue called queue.publicasync Task ProcessQueueMessage([QueueTrigger("queue")]string message, TextWriter log, CancellationToken ct){log.WriteLine("New random number {0} from shared number service for message: {1}",this.numberService.GetRandomNumber(),message);using(var scope =this.jobActivatorDependencyResolver.BeginScope()){Console.WriteLine("Beginning scope work...");log.WriteLine("New random number {0} from scoped number service for message: {1}",scope.CreateInstance<INumberService>().GetRandomNumber(),message);awaitscope.CreateInstance<IUnitOfWork>().DoWork(ct,message);Console.WriteLine("Finishing scope work...");}}}}
We can pay attention to several things here:
An INumberService instance is injected in our function and shared among jobs.
We also demonstrate the possibility to create a specific instance of INumberService for the scope.
The IUnitOfWork DoWork call could typically be a work against a database.
All the instances created inside the scope will be disposed immediately before the function ends.
To go further
If you test the source code, the console output will be the following when the function is triggered:
We have seen how to create a Dependency Scope in a Microsoft Azure WebJob function in a more advanced scenario which completes the previous article.
Now in the scenario we just covered there is place for improvement. Instead of calling a CreateInstance<T>() every time we need an object, we could simplify it by creating job handlers.
This will be the subject of the last article in the series about Dependency Injection in Azure WebJobs, stay tuned!
A useful TableQuery extension to retrieve all the results of a Microsoft Azure Table storage in a single asynchronous operation.
In the Azure Storage client library that you use to work with Azure Table storage, you may have notice that nothing will allow you to retrieve asynchronously all the results of a query in a single operation and that’s probably what brought you here.
If you take a look at TableQuery<TElement> you will find two methods:
Execute: synchronously executes a query on a table.
ExecuteSegmentedAsync: asynchronously executes a query on a table and return segmented results.
Same goes for CloudTable:
ExecuteQuery<TElement>: synchronously executes a query on a table.
ExecuteQuerySegmentedAsync<TElement>: asynchronously executes a query on a table and return segmented results.
The legitimate question for you to ask is where are the methods ExecuteAsync and ExecuteQueryAsync?
Well those methods are not available in the library. If you want to get all the results of a query in one shot your only choice is to do so synchronously. If you want to get all the results in an async way, you will have to work with segmented results.
In many case asynchronously working with segmented results is the best option and that’s probably why the Azure team built it this way. Working with segments is great, especially when you have a lot of records because you don’t have to wait for all the results to start processing them, think parallel processing.
But in some case you want to get all the results before processing them, and if you are in an async context the following extension may help you.
Creation
In my scenario I know I’ll always work in a small set of records, I’m in an async context and I need to get all the results before processing them.
The ExecuteAsync TableQuery extension looks like the following:
using System.Collections.Generic;using System.Linq;using System.Threading;using System.Threading.Tasks;using Microsoft.WindowsAzure.Storage.Table;using Microsoft.WindowsAzure.Storage.Table.Queryable;namespace AzureTableStorage.TableQueryAsync{publicstaticclassTableQueryExtensions{/// <summary>/// Initiates an asynchronous operation to execute a query and return all the results./// </summary>/// <paramname="tableQuery">A Microsoft.WindowsAzure.Storage.Table.TableQuery representing the query to execute.</param>/// <paramname="ct">A System.Threading.CancellationToken to observe while waiting for a task to complete.</param>publicasyncstatic Task<IEnumerable<TElement>>ExecuteAsync<TElement>(this TableQuery<TElement> tableQuery, CancellationToken ct){var nextQuery =tableQuery;var continuationToken =default(TableContinuationToken);var results =new List<TElement>();do{//Execute the next query segment async.var queryResult =awaitnextQuery.ExecuteSegmentedAsync(continuationToken,ct);//Set exact results list capacity with result count.results.Capacity+=queryResult.Results.Count;//Add segment results to results list.results.AddRange(queryResult.Results);continuationToken=queryResult.ContinuationToken;//Continuation token is not null, more records to load.if(continuationToken!=null&&tableQuery.TakeCount.HasValue){//Query has a take count, calculate the remaining number of items to load.var itemsToLoad =tableQuery.TakeCount.Value-results.Count;//If more items to load, update query take count, or else set next query to null.nextQuery=itemsToLoad>0?tableQuery.Take<TElement>(itemsToLoad).AsTableQuery():null;}}while(continuationToken!=null&&nextQuery!=null&&!ct.IsCancellationRequested);returnresults;}}}
We can pay attention to two things here:
We are using TableContinuationToken. It is the usual way to do when working with segments.
This token will let us know if more results are available or else it will be null.
As you can notice the extension is simple, however the trickiest part comes when a TableQuery has the TakeCount property set. In that case we need to reevaluate the number of items to take after each segment results.
Example of use
Here is a quick example showing how to use the extension in a console application:
using System;using System.Linq;using System.Threading;using System.Threading.Tasks;using Microsoft.Azure;using Microsoft.WindowsAzure.Storage;using Microsoft.WindowsAzure.Storage.Table;using Microsoft.WindowsAzure.Storage.Table.Queryable;namespace AzureTableStorage.TableQueryAsync{classProgram{staticvoidMain(string[] args){ExecuteSimpleTableQuery(CancellationToken.None).Wait();Console.ReadLine();}privatestaticasync Task ExecuteSimpleTableQuery(CancellationToken ct){var table =awaitGetTable(ct);var query =table.CreateQuery<MyTableEntity>().Where(r =>!r.MyProperty.Equals(string.Empty)).Take(1200).AsTableQuery();var results =awaitquery.ExecuteAsync(ct);Console.WriteLine($"Results {(results.Any()?string.Empty:"not ")}found.");}privatestaticasync Task<CloudTable>GetTable(CancellationToken ct){//Retrieve the storage account from the connection string.var storageAccount =CloudStorageAccount.Parse(CloudConfigurationManager.GetSetting("StorageConnectionString"));//Create the table client.var tableClient =storageAccount.CreateCloudTableClient();//Retrieve a reference to the table.var table =tableClient.GetTableReference("mystoragetable");//Create the table if it doesn't exist.awaittable.CreateIfNotExistsAsync(ct);returntable;}}}
This TableQuery will let us get 1200 results asynchronously with entities having the property MyProperty not empty.
To go further
When a segmented query is executed a maximum of 1,000 entries is returned. If the value specified for the TableQuery TakeCount property is greater than 1,000, the library will ignore it and limit it to 1,000.
Summary
Thanks to this extension we have seen how to retrieve all the results of a Microsoft Azure Table storage in a single asynchronous operation. Of course I advise you to use it wisely, in scenarios where you specifically need to get all the results before processing them, for other scenarios you should stick to the segmented query.
In this article we will discover in a simple scenario how to use Unity in a Microsoft Azure WebJob.
If you are a user of Azure App Service you are probably aware of the Azure WebJobs. If it’s not case the case, I advise you to take a look at it because Azure WebJobs are very powerful to run background processes and comes at no extra cost when already using Azure App Service (Web Apps, Mobile Apps, API Apps, Logic Apps).
Also Azure WebJobs come along the Azure WebJobs SDK that has a great trigger system to work with Azure Storage. For example a job function can be automatically started when a message is inserted into an Azure Queue storage.
Behind the scene the trigger system will create a new instance of the class containing the function, then the function will be invoked. The responsibility of creating instances of job classes is given to the JobActivator.
DefaultJobActivator
Now let’s take a look at the original source code of the DefaultJobActivator on GitHub:
// Copyright (c) .NET Foundation. All rights reserved.// Licensed under the MIT License. See License.txt in the project root for license information.using System;namespace Microsoft.Azure.WebJobs.Host.Executors{internalclassDefaultJobActivator: IJobActivator{privatestaticreadonly DefaultJobActivator Singleton =new DefaultJobActivator();privateDefaultJobActivator(){}publicstatic DefaultJobActivator Instance{get{returnSingleton;}}public T CreateInstance<T>(){returnActivator.CreateInstance<T>();}}}
Here you can notice two things:
Activator.CreateInstance<T>() is used to create an instance of the specified type.
DefaultJobActivator implements IJobActivator.
The problem with this implementation is that only an instance of a job class with parameterless constructor can be created.
Fortunately for us the Azure WebJobs SDK allows to specify a custom JobActivator in the JobHostConfiguration.
In the original source code on GitHub we can see that the DefaultJobActivator is used when creating a new JobHostConfiguration:
Now let’s take a look at how to replace the default job activator with our own using Unity!
Creation
For our needs we will create the following interface inheriting from IJobActivator:
using System;using Microsoft.Azure.WebJobs.Host;namespace AzureWebJobs.JobActivatorUnity.Dependencies{publicinterface IJobActivatorDependencyScope : IJobActivator, IDisposable{}}
Now we will create the Unity implementation of it:
using System;using AzureWebJobs.JobActivatorUnity.Dependencies;using Microsoft.Practices.Unity;namespace AzureWebJobs.JobActivatorUnity.Unity{publicclassUnityJobActivatorDependencyScope: IJobActivatorDependencyScope{privatereadonly IUnityContainer container;publicUnityJobActivatorDependencyScope(IUnityContainer container){if(container==null)thrownew ArgumentNullException("container");this.container=container;}public T CreateInstance<T>(){returnthis.container.Resolve<T>();}publicvoidDispose(){this.container.Dispose();}}}
Thanks to this implementation the responsibility of creating instances is given to the Unity container through the invocation of container.Resolve<T>().
Example of use
We have created a custom JobActivator, now we will learn how to use it in a simple scenario.
First we will configure the Unity container and register a simple service to it:
using System;using AzureWebJobs.JobActivatorUnity.Contracts;using AzureWebJobs.JobActivatorUnity.Services;using Microsoft.Practices.Unity;namespace AzureWebJobs.JobActivatorUnity{publicclassUnityConfig{#regionUnity Containerprivatestatic Lazy<IUnityContainer> container =new Lazy<IUnityContainer>(()=>{var container =new UnityContainer();RegisterTypes(container);returncontainer;});/// <summary>/// Gets the configured Unity container./// </summary>publicstatic IUnityContainer GetConfiguredContainer(){returncontainer.Value;}#endregion/// <summary>Registers the type mappings with the Unity container.</summary>/// <paramname="container">The unity container to configure.</param>publicstaticvoidRegisterTypes(IUnityContainer container){container.RegisterType<INumberService, NumberService>(new ContainerControlledLifetimeManager());}}}
Here nothing special as it’s a common Unity container configuration. The INumberService is used for the example and will allow us to return a random number.
Now we will configure our WebJob to use our custom IJobActivator:
using AzureWebJobs.JobActivatorUnity.Unity;using Microsoft.Azure.WebJobs;namespace AzureWebJobs.JobActivatorUnity{// To learn more about Microsoft Azure WebJobs SDK, please see http://go.microsoft.com/fwlink/?LinkID=320976classProgram{// Please set the following connection strings in app.config for this WebJob to run:// AzureWebJobsDashboard and AzureWebJobsStoragestaticvoidMain(){var config =new JobHostConfiguration(){JobActivator=new UnityJobActivatorDependencyScope(UnityConfig.GetConfiguredContainer())};var host =new JobHost(config);// The following code ensures that the WebJob will be running continuouslyhost.RunAndBlock();}}}
In our job function we use can now use the INumberService:
using System;using System.IO;using AzureWebJobs.JobActivatorUnity.Contracts;using Microsoft.Azure.WebJobs;namespace AzureWebJobs.JobActivatorUnity{publicclassFunctions{privatereadonly INumberService numberService;publicFunctions(INumberService numberService){if(numberService==null)thrownew ArgumentNullException("numberService");this.numberService=numberService;}// This function will get triggered/executed when a new message is written // on an Azure Queue called queue.publicvoidProcessQueueMessage([QueueTrigger("queue")]string message, TextWriter log){log.WriteLine("New random number {0} for message: {1}",this.numberService.GetRandomNumber(),message);}}}
We can pay attention to several things here:
The INumberService is automatically injected in our function thanks to the Unity container.
When the ProcessQueueMessage function is triggered by the QueueTrigger we can seamlessly use the number service.
We could easily add other dependencies to the function.
To go further
When a function is triggered by the Azure WebJobs trigger system it is interesting to understand that a new instance of the class containing the function is created via the IJobActivator before invoking the function itself. This is important because every time a function is triggered it gives you latitude on the configuration of the dependencies’ lifetime.
Summary
We have seen how to use Unity as job activator and implement IoC and DI in a Microsoft Azure WebJob simple scenario.
Of course instead of using Unity you are free to use another IoC container like Autofac, Ninject, Simple Injector, etc.
Now in the scenario we just went through you may have asked yourself: “But how can I get a dependency scope only for the lifetime of my function?”.
Yes what if I want to get dependencies that will be just instantiated for my function and make sure that those resources will be disposed when the function’s job is done. Like reaching a database for the purpose of the function and close the connection, dispose all the resources properly. Well that will be the subject of my next article about Azure WebJobs in a more complex scenario, stay tuned!
After years developing with ASP.NET MVC I finally made the jump.
This may seem weird for some of you but I have never tried to take the ASP.NET MVC exam although I’ve developed several applications both personally and professionally, this very same website was built with it and I have published several articles on it.
Why not before?
To be honest I have never been comfortable with certifications, I don’t want to learn by heart or use brain dumps. What I like is to learn by doing, problem is it takes time.
My journey with ASP.NET MVC started 7 years ago, summer 2009, with ASP.NET MVC 1.0. Since then I went through all the versions on various projects.
By the way ASP.NET MVC 3 was the real usable version!
It is out since October 2012, the pool of questions is robust
It is up to date with ASP.NET MVC 5
I wanted to challenge myself, after all those years I was supposed be a good candidate
It is not planned to be retired
The most important point for me is the last one, because I didn’t want to pass an exam knowing it will be retired shortly.
For now, it is not planned to be retired and don’t think it will be retired soon. Sure it will be updated but I don’t think it will be retired.
Also now it is included in ASP.NET Core and is 90% identical to the original.
Considering all this we can see long-term and I consider this exam as a good investment (time/money) because you are not going to lose all your knowledge tomorrow.
Passing the exam and result
I bought the Microsoft Certification Booster Pack (exam + 4 retakes) and I scheduled an online proctored exam.
I did not study before the exam and all those years developing with ASP.NET MVC paid off.
After two and an half hours I successfully passed the exam at the first shot! All the questions made sense, case studies were interesting. Yes as often there are some tricky questions but overall it has been a great way to validate my knowledge, it is very satisfying.
Also it was my first online exam, it is convenient to schedule after work at 6pm and pass it at home. However it is very serious, and the work-area scan by the greeter was pretty epic!
Final thought
I’m glad I did the move, it is rewarding. So if you are in a situation similar to mine I encourage you to go ahead and validate your knowledge.
Please feel free to comment or contact me if you have any question. Of course don’t ask me about to the content of the exam, as you know Non-Disclosure Agreement apply for Microsoft Certification Exams.
So that you don’t need to submit your application to get it’s id and resubmit it.
For my future WP7 application Warnygo, I needed to get its id for several reasons. For example, use it with the ShareLinkTask or send it to my services.
As you may know, you can find your application id in the WMAppManifest.xml. It’s the ProductID attribute in the App node.
When you first create your application with Visual Studio, you get a random one. But you will get a new one through the marketplace submission process. So how to get your application id in your application once submitted?
Well, the ugly way is to:
Submit your application to the marketplace so that you can get the real application id.
Then update your application with the new application id wherever you need it.
To finish resubmit your application.
Personally I don’t like this way!
The clean way that I propose is to directly read the application id in the WMAppManifest.xml file. Check this code:
A looooong title for a recurring question when you start developping a Windows Phone 7 Application.
It’s been a while since my last article (April 21, 2011! Wo!), but time is running so fast and I was very busy with several projects.
One of these was real live tracking in rally with WP7 and Bing Maps for the International Rally of Burgundy. See WP7 for tracking in Rallye on WPCentral for more details.
So go back to the subject of this article. I recently restarted the development of a WP7 application named Warnygo from scratch with Mango tools and I faced the same questions.
Reminder about NavigationService
As you know when you want to navigate from one view to another, you use the NavigationService like that:
As you may notice, we are setting the view navigation parameters in the Navigated event. This event is triggered before the OnNavigatedTo in the target view.
Example of use
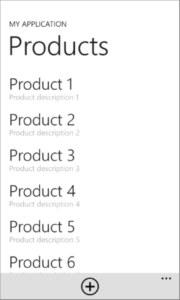
For the purposes of this article I have created a simple Windows Phone 7 solution (You can download it bellow) to show you how to use the two NavigationService extensions. In this solutions we have three views:
As you see the view is decorated with our custom attribute named ViewInfos where we specify the view path.
When we click on the Navigate to products button we are calling the first NavigationService extension, because we simply need to navigate to the product list view, without parameters.
On the other hand, in the product list view we need to pass the selected product to the product details view.
We are navigating to the product details view when the application bar button is clicked or when a product is selected. We specify that the navigation parameters type is EditProductParameters.
We can then use the navigation parameters in the product details view:
To make this article simple I didn’t use MVVM pattern. In fact in my own WP7 framework I didn’t created those two NavigationService methods as extensions. Initially it is two methods in my ViewModelBase so I can navigate from a ViewModel to a View. All this to say that you can use those extensions even if you are developing your application using MVVM pattern.
I’d like to add that the solution I give you here is not THE solution it is a way to answer this article main questions about the NavigationService.
Summary
We have seen how to Navigate from one view to another passing a complex object parameter without specifying the target view Uri in a Windows Phone 7 Application.
Isn’t that cool?! I mean, supposing that you are developer of course, because if you’re not you don’t give a sh** about that! 🙂
No, to be serious our code is way cleaner like that, isn’t it?